|
Installation of Model Engine Bearings
Over the years, people have offered advice to me about how to replace bearings. They ran the gamut from the crude to the absurd!
My favorite class has always been the .21 class! Perfect bearing fit was vital to me! Perfect installation is much more important here than with the larger engines. Why, because the little engines have so little excess horsepower. They use ALL of the output. If something is not perfect, the engine will show it more emphatically than the large engines having a lot of excess horsepower. Doesn't mean that you should cut corners with the larger engines, just that it wouldn't show as much!
Selection of the replacement bearing is important. Choose a replacement bearing with either a phenolic or plastic retainer (metal retainers tend to fail at high rpms). Use either a grade 3 or 5 bearings, so that you have tolerances that are correct. The BEST bearing is one having C3 or C5 fit and "loose internal fit".
I like to remove all oil from the bearing to be installed, so that there is nothing to burn if temps are high in the replacement process. It tends to "gum up the bearing". Probably doesn't really hurt anything, but the bearing doesn't roll very well with the gum in it.
NOTE: BE SURE TO LUBRICATE THE BEARING WELL AFTER INSTALLATION AND COOLING! I like to use Bocas Midas Touch Lubricant to assemble the engine. It has Teflon platelets that really seem to protect the engine at startup.
After you have your crankcase clean (use soap, water and toothbrush) and dry, place it on a clean towel ready for installation of the bearings.
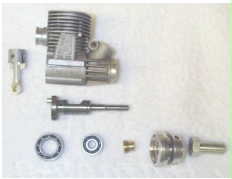
I like to use a stand of some type that will allow you to place your crankshaft in an upright position ready for installation of the crankcase over the crank assembly. Place the large bearing on the crank, and place on the stand. 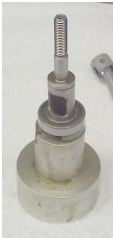
Have the front bearing, the flywheel collet, the flywheel and the threaded flex connector on the clean towel ready for installation.
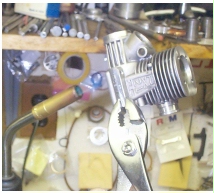
Heat the crankcase using a propane torch (can use the oven, but is much more difficult to coordinate) until it is hot. This will take a little experimentation, as I don't know a proper way to explain the extent of heating. You don't want to melt the crankcase, but you want it hot enough to allow the bearings to slip into the crankcase easily. If there is a little oil residue in the crankcase, just at the point that the oil smokes a little is about right. You might place a drop of oil in the crankcase to observe this smoking. We looks for the steam to "puff out" the front or rear housing tapped hole farthest away from the flame. There is always a little water left after washing the crankcase.
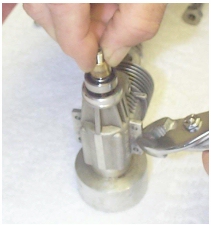
After the crankcase is hot, quickly place the crankcase over the crank assembly seating the large bearing. Take the small bearing in your hand and QUICKLY place it on the front of the crank and seat it with your fingers. Place the flywheel collet on the crank, then the flywheel and then tighten the flex collet. You don't have to torque the collet, just finger tight. Check to see that the assembly turns freely and allow cooling. You should also be able to feel a little end play in the crank/flywheel assembly!

After the engine cools, the crank should spin with almost no friction. Remember that the bearings have no lubrication. Be sure to lubricate, after the assembly cools, and as you continue assembly.
Note:
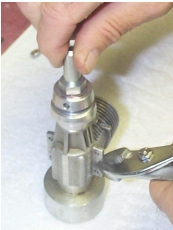
Sometimes if the fit does not feel perfect, I will re-heat the crankcase, holding with pliers on the mounting lugs, until the bearings seek their natural position. You will see the flywheel drop at the instant that the heat is enough for the bearings to move. Let it cool again and it may be even better. While you are applying heat, try to move the flame around to get the heat as even as possible.
Marty Davis
|

